One of the first ever cloth nappies I made was a fitted nappy, this very simple cloth nappy tutorial is based on this first cloth nappy, and is very simple to make and use. This cloth nappy with require a cover, which I don’t cover here, but will show you how to make in a future tutorial. It’s also a one size fits most nappy, so can be a very economical nappy to make.
What materials you need
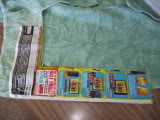
To make the nappy in this simple fitted cloth nappy tutorial you will need elastic, a sewing machine, microfleece and an absorbent fabric, such as our hemp or bamboo. In the photos I have used an old bath towel, which you could also use. The nappy is closed using a snappi nappy fastener, which you can buy here, although you can also use a nappy pin.
Before you start you will also probably need to make a paper pattern, and for this you’ll need some paper, either newspaper or wallpaper would work well. You’ll also want a tape measure, ruler, pen and scissors.
The very simple fitted cloth nappy tutorial
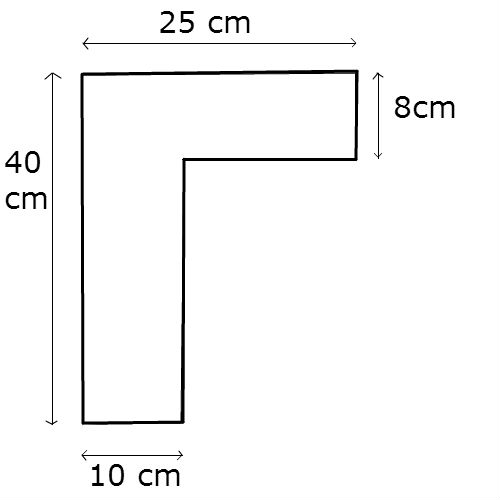
The first step is to make your paper pattern piece, I usually make half of the nappy shape, and cut it out on a fold. The only reason for this, is because it uses less paper. The pattern piece is made with approximately 50 mm (0.5cm) seam allowance. Make the shape approximately 40cm long by 10cm wide. The top section is 25cm wide by 8cm deep.
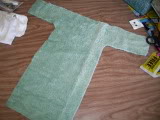
Place your pattern piece on a fold of the fabric so when cut out you get a ‘T’ shape when unfolded. You need to cut this piece in both the absorbent fabric and the micro fleece. Now open out the cut out pieces and pin right sides together. The hemp or bamboo doesn’t usually have a right or wrong side, but for this nappy you will need to have the smooth side as the ‘wrong’ side, as the snappi will not attach to it.
Now sew around the edge of the nappy starting at the bottom on the side, sew up the side, around tabs, across the top of the nappy, back around other tab and down the other side. Leave the bottom of the nappy open. You can neaten this if you wish, but as the bamboo and hemp fabrics do not fray, and neither does the microfleece, you do not need to do so.
The next step is to attach the elastic to the inside of the nappy, pre-stretch the elastic before sewing. Starting on the left hand side, 5 cm from the bottom edge, attach the elastic using a zig zag or three step zig zag stitch. Keep the elastic stretched out as you sew it on. Sew right into the corner of the nappy. Repeat on the other side. At the top of the nappy, sew on the elastic in the same way 15 cm from the edge of the tab, to approx 15 cm from the other side of the tab.
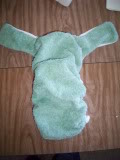
You can now use the opening to stuff the nappy with extra inserts or boosters for night time use. To use on a small baby tuck in the bottom of the nappy to make it shorter. Fasten around your baby with a snappi or nappy pins, and use a cover.

Using your fitted nappy
Now you’ve made your nappy using the very simple fitted cloth nappy tutorial, you are ready to go. I would always recommend pre-washing before use, although you should always pre-wash the fabric to allow shrinkage before sewing. The nappy has a stay dry layer, and can be stuffed with lots of extra boosters for night time, or without boosters for daytime use.
The very simple fitted cloth nappy tutorial can be followed to make nappies for personal use, or to sell. All that we ask if you make these nappies to sell is that you state that it is using this pattern and give credit to us, minkylicious. We also ask that where possible, you buy the fabric to make these nappies from us.


what materials are more comfortable than those mentioned?
Any absorbent fabric will work well. As the nappy has a microfleece layer against the skin, most fabrics will be comfortable.